I'm creating this thread as a walk through for those of you that would like to perform a "Bafflectomy" on your Honda 919. It is a very straight forward and simple modification that opens the exhaust note up as well as give the rider a better "feel" for the bike due to the restrictive nature of the stock exhaust with baffles.
*BEWARE* This modification is irreversible, if you mess up, you're on your own!
To start, you're going to need several tools:
-1 1/4" Bi-Metal Hole Saw
-2 1/8" Bi-Metal Hole Saw
-Power Drill
-12mm socket
-Phillips head screwdriver
-A long 8-12" ~ 1" diameter bar or tube (for breaking the welds on the baffle)
-Vacuum/Telescoping Magnet
-A beer.
So now you have your tools, let's begin tearing the bike apart!
First off, I recommend (although not necessary) to remove the seat and tail from the bike. The seat, just remove as normal.
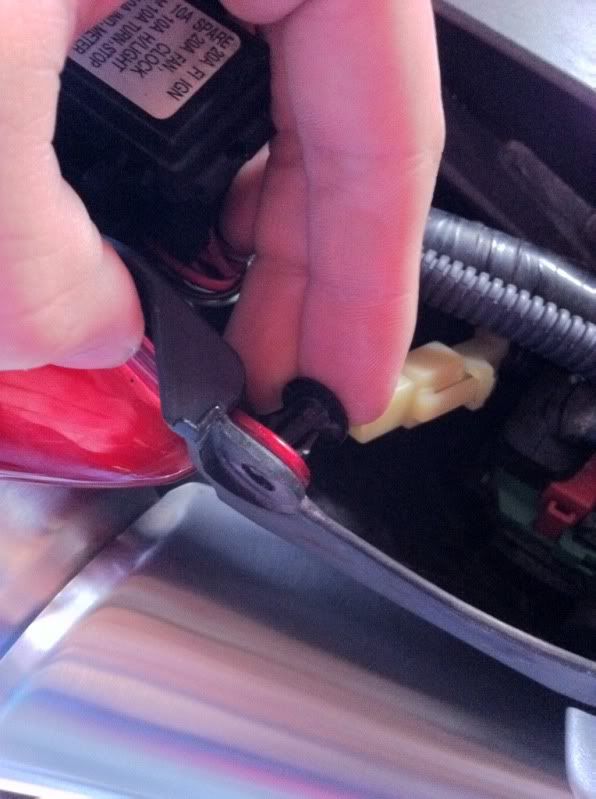
The tail, you must first remove two push clips located at the front of the tail section:
![Image]()
Next, remove the two 12mm bolts located the the back of the tail section:
![Image]()
Once these two bolts and two clips are removed, you can slowly slide the tail section from the frame of the bike. Be aware, the tail light is still connected so you will have to unclip the connectors for that.
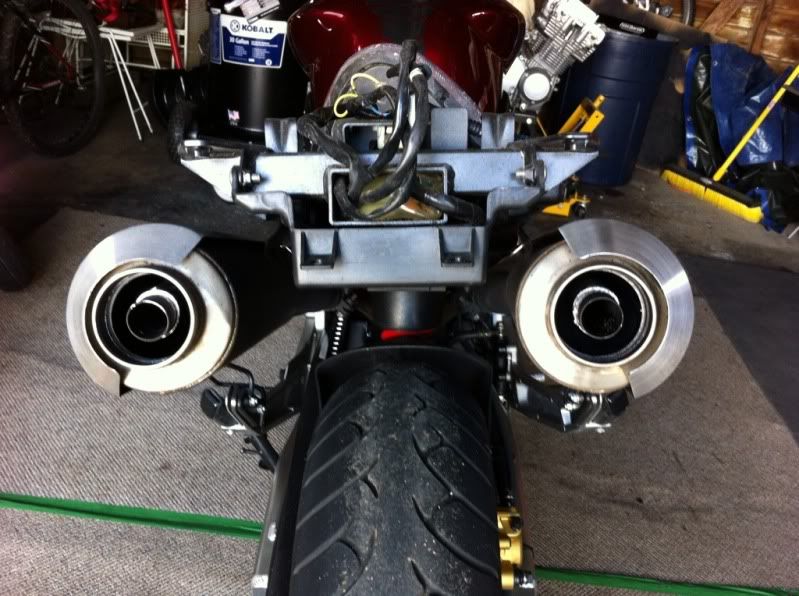
When all is done, it should look like this:
![Image]()
Next step, get your power drill out and attach the 1 1/4" hole saw:
![Image]()
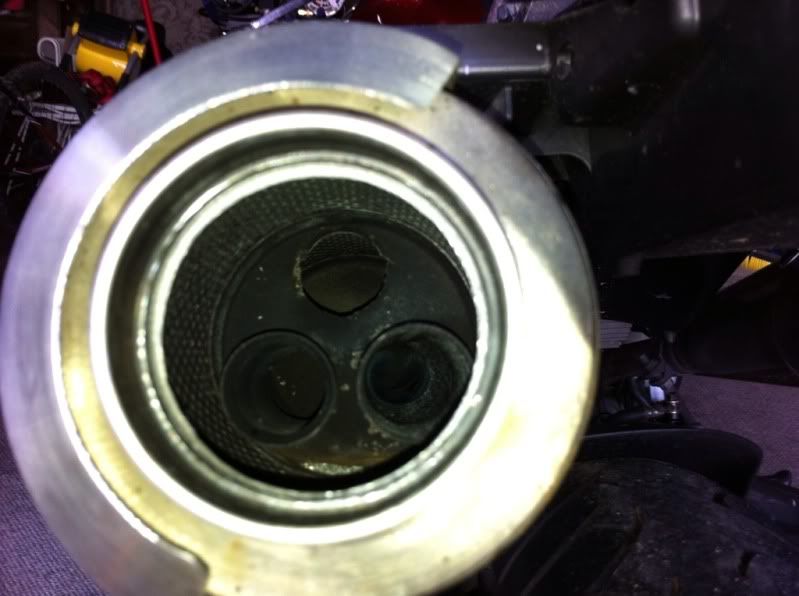
Using the 1 1/4" hole saw, you are going to SLOWLY drill around the exhaust at this location:
![Image]()
This will be the result:
![Image]()
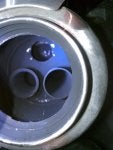
Now, using the 2 1/8" hole saw, you will repeat the process for the outer portion of the exhaust cap. Once finished, it will look like this:
![Image]()
Notice the "washer" that was left over? Use a small telescoping magnet or needle nose pliers and remove that:
![Image]()
Also, clean up any metal dust created by the drilling. I used a magnet, but a shop vac with a smaller hole would work as well.
Both exhausts with "washer" piece removed:
![Image]()
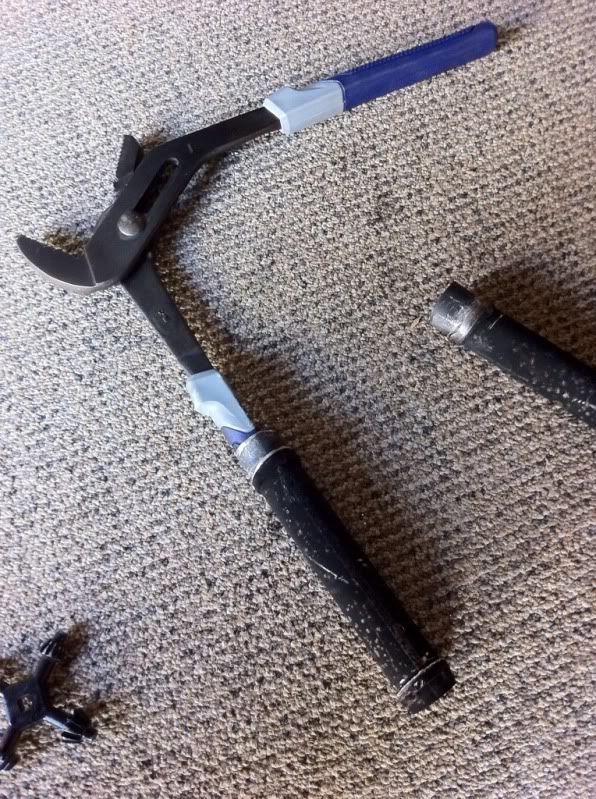
Next, we need to break the welds on the baffle pipe. To do this, I recommend getting a long bar or pipe and inserting it into the pipe itself. This is so you can move the pipe back and forth, softening the welds and allowing them to easily break.
I used an old pair of channel locks:
![Image]()
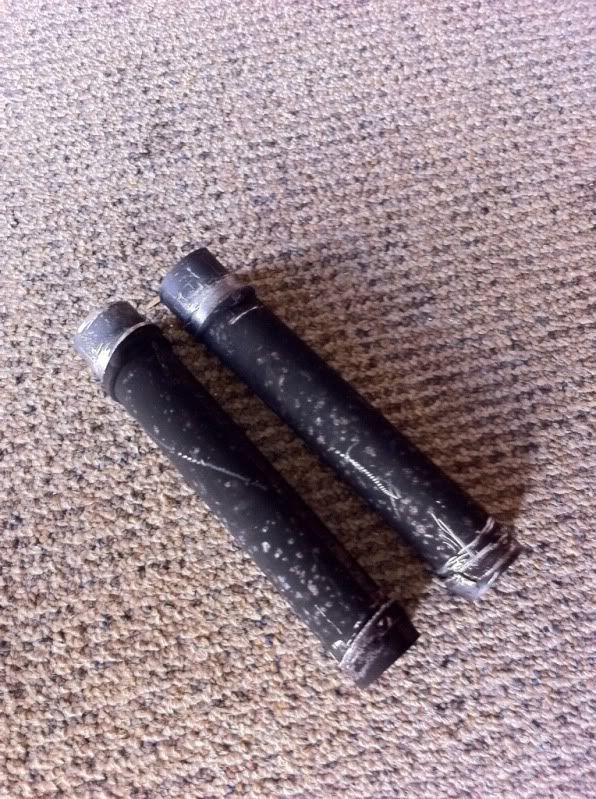
Both pipes removed:
![Image]()
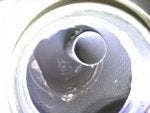
The result of removing the baffle pipe and exhaust caps:
![Image]()
![Image]()
Also, make sure to spray some high temp engine paint (black) on the section of exhaust that you drilled out, to stop any rust from forming and give a nice clean look.
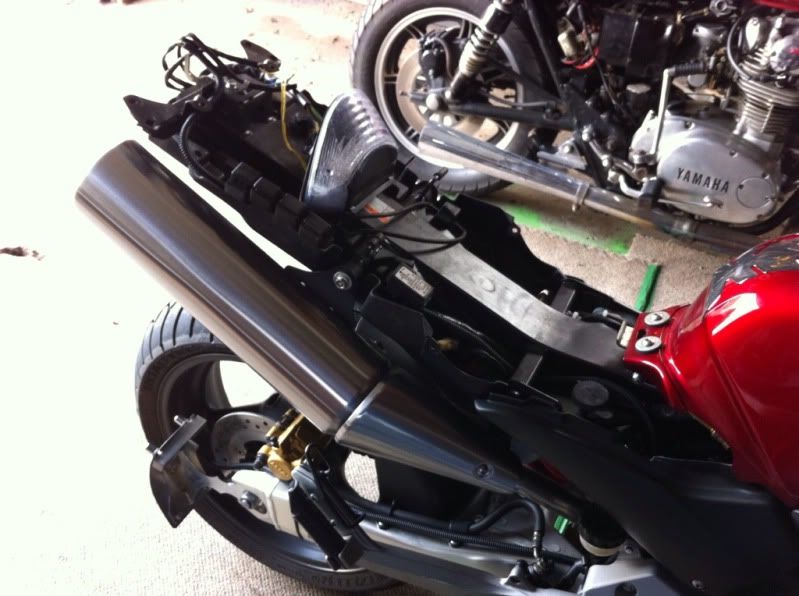
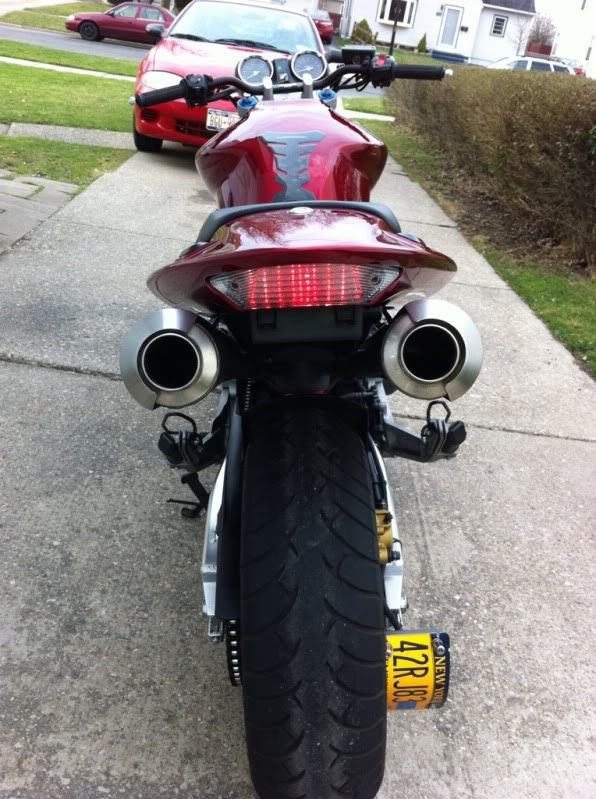
With the tail section back on:
![Image]()
Andddd...CONGRATULATIONS!! You just performed your first bafflectomy. You'll notice a grumble at idle, and a nice exhaust note at peak RPMs. Not too bad for a free modification!
If you have any questions, or comments feel free to PM me.
Thanks guys,
Chris
*BEWARE* This modification is irreversible, if you mess up, you're on your own!
To start, you're going to need several tools:
-1 1/4" Bi-Metal Hole Saw
-2 1/8" Bi-Metal Hole Saw
-Power Drill
-12mm socket
-Phillips head screwdriver
-A long 8-12" ~ 1" diameter bar or tube (for breaking the welds on the baffle)
-Vacuum/Telescoping Magnet
-A beer.
So now you have your tools, let's begin tearing the bike apart!
First off, I recommend (although not necessary) to remove the seat and tail from the bike. The seat, just remove as normal.
The tail, you must first remove two push clips located at the front of the tail section:
Next, remove the two 12mm bolts located the the back of the tail section:

Once these two bolts and two clips are removed, you can slowly slide the tail section from the frame of the bike. Be aware, the tail light is still connected so you will have to unclip the connectors for that.
When all is done, it should look like this:
Next step, get your power drill out and attach the 1 1/4" hole saw:

Using the 1 1/4" hole saw, you are going to SLOWLY drill around the exhaust at this location:

This will be the result:

Now, using the 2 1/8" hole saw, you will repeat the process for the outer portion of the exhaust cap. Once finished, it will look like this:

Notice the "washer" that was left over? Use a small telescoping magnet or needle nose pliers and remove that:

Also, clean up any metal dust created by the drilling. I used a magnet, but a shop vac with a smaller hole would work as well.
Both exhausts with "washer" piece removed:
Next, we need to break the welds on the baffle pipe. To do this, I recommend getting a long bar or pipe and inserting it into the pipe itself. This is so you can move the pipe back and forth, softening the welds and allowing them to easily break.
I used an old pair of channel locks:
Both pipes removed:
The result of removing the baffle pipe and exhaust caps:

Also, make sure to spray some high temp engine paint (black) on the section of exhaust that you drilled out, to stop any rust from forming and give a nice clean look.
With the tail section back on:
Andddd...CONGRATULATIONS!! You just performed your first bafflectomy. You'll notice a grumble at idle, and a nice exhaust note at peak RPMs. Not too bad for a free modification!
If you have any questions, or comments feel free to PM me.
Thanks guys,
Chris
")